Growing out your hair, for a good cause is becoming more and more favoured by many people. Donating your hair to make wigs for cancer victims as well as other medical conditions that causes hair loss is one of the most personally satisfying and rewarding things that you could do with your hair.
Afew weeks ago, Emily Wang came into our salon and did just that, She had been growing her hair out for the past year so that she could make a donation to an organisation called LOCKS OF LOVE http://www.locksoflove.com/
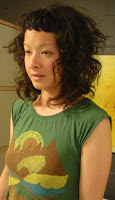
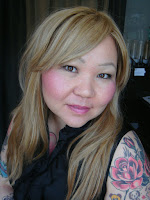
 Emily with her long locks before she came in for the big chop
Now before you all go running out to make your donations, its a good idea to do your homework first as there are some rules to hair donating….
Most of the organisations require you to have between 8 – 12 inches of hair, with some charities, colored (tinted) hair is acceptable but no bleach, perms or highlighted hair.
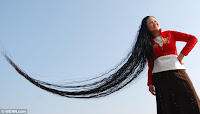
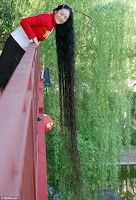
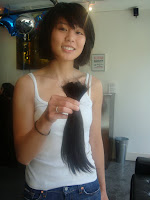 Here’s Emily holding her 10inches of hair.
Some organisations will not even accept grey hair. The reason why grey, permed, highlighted and bleached hair is not accepted is because these charities try to make their wigs as realistic as possible and need the hair to absorb color evenly and consistently, when the hair has been processed or not processed at all (as in grey hair) the color consistency is not even enough to achieve this look. Chemically processed hair is also too porous to hold the dyes used in the process and leads to fading in the wigs.
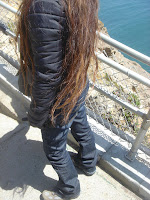
 Finished style!!
Some more hints for hair donations: Make sure you grow enough hair to cut it to your desired length as well as the 8 – 12 inches. If you don’t plan on having your finished result too short then please allow enough hair in between for bounce, and shaping of hair. You need to allow your stylists some lee-way to make sure your leftover hair is long enough to shape into your desired haircut.
With layered hair, the shortest layer also needs to be the required length otherwise it cannot be used.
 Here are some some of the more popular charities:
Locks of Love – 10-12″ needed, color OK, no bleach
Wigs for Kids – 12″ needed, no color, perms, highlights or grey
Pantene Beautiful Lengths – 8″ needed, no color or bleach
Childhood Leukemia Foundation – 12″ needed, no color, no grey
Above are just guidelines for the different charities, please do some research for yourself before choosing the one that is right for you.
Meanwhile, Thanks to Emily for her donation as well as allowing me write about it for my blog!
Stylists Tips:
To cut the hair for hair donations, try not to tie your hair into one big ponytail at the back, this will usually result in cutting off too much at the back (leaving a hole that’s difficult to work from afterwards)and not enough from the front.
Of course, depending on the length you want to go to after the haircut, this will help you decide how to take the donated hair off.
If you want short hair all over as a finished result, you could tie small ponytails all around the head and cut them off.
If you want a graduated bob shape (where it sits up and in at the back) then one ponytail at the back is OK to do. (But still not the best method)
If you want longer chin length hair, then you could either tie around 4 or 5 low ponytails around the base of the hairline area Or you can hold and cut pieces off at a time without scrunching the hair together too much and then pass the hair onto someone who can hold them altogether with the roots in the same direction until you have cut it all off and then the hair can be tied together.
If the hair is layered, ponytails throughout the head is tied up and cut off.
With all methods, please do not tie or hold the hair too tightly as the hair will bounce and jump up with the tension.