Dekko’s Daily Grind ~ Michele Lim

Its been a while since I posted a makeover from Dekko, so with this one, its been on the backburner for so long now that Michele has actually had her haircut 3 times since this first picture was taken. I decided to show it all at once because the changes look great on Michele and she’s changed her looks so much since the first time.
 

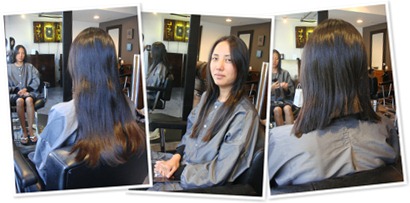
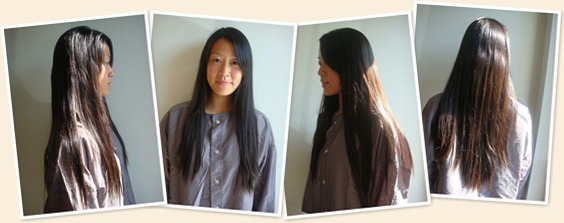
Michele had not had a haircut in quite a number of years, she decided she grow her hair out and in the meantime, she could donate her hair to one of the hair donation companies such as  Locks of Love.

Here is Michele when she first came in and with my first chop!
 

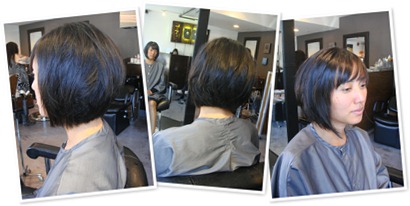
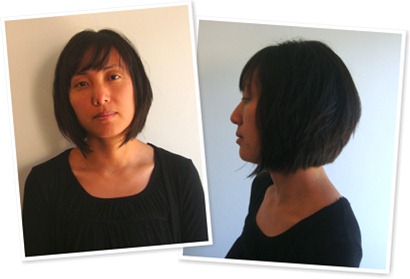
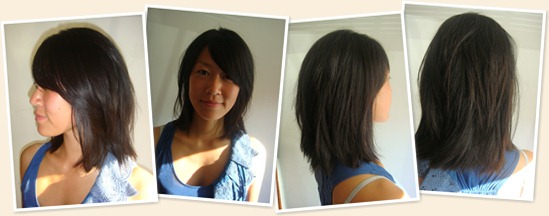
The style we decided to go for was a bob with graduation, and we decided to cut it with a razor to give the hair some softness through the ends therefore creating some movement in the layers. With hair this coarse,  we felt that if the hair was too blunt on the ends using a club cutting technique, the whole shape would be very heavy and would collapse quicker and easier. The end result as you can see suits Michele’s face really well, and what was great was that the hair fell into place without too much blow drying or too much work.
 

And here’s  a couple more without her gown on : )
 

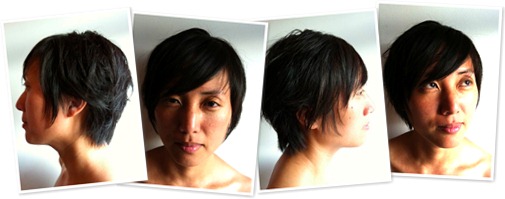
Anyway, now because it took me so long to post these pictures, we ended up cutting this shape twice before Michele came in again and after a very long consultation,  decided to take the hair even shorter. We went with a style that could be tucked behind the ears to give a sleeker look or when left down, gave an elf-ish, pixie look. Again we razored the whole thing through, even more than the first time, took lots of weight out of it so it had a lot of texture and using some styling cream we dried it with our fingers, manipulating it on the ends so it would stick out and twist in certain areas, the messier the hair went, the better the shape looked, but it was good to know that for meetings Michele was still able to make it look neat and tidy.

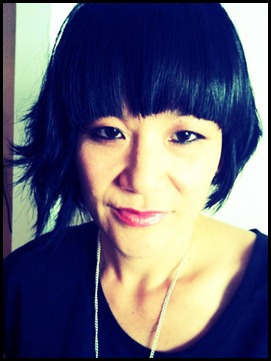
Here’s Michele’s latest look:
 

Thanks to Michele for letting my take pictures of her hair, as well as being so patient waiting for me to do my posts : )

Technorati Tags: ,,

Moroccan Oil

It had to be done, it was only a matter of time before I wrote my own review on the Moroccan Oil. Every Tom Dick and Harry has tried it and talked about it, so I was one of the late comers!
 
To be honest with you, I have never really been into oils for the hair, I have always found them to be heavy, and slick looking! Anyway, we finally decided to carry it in Dekko Salon because everyone in Hollywood has ranted and raved about it and who are we to go against what Hollywood says eh?
 
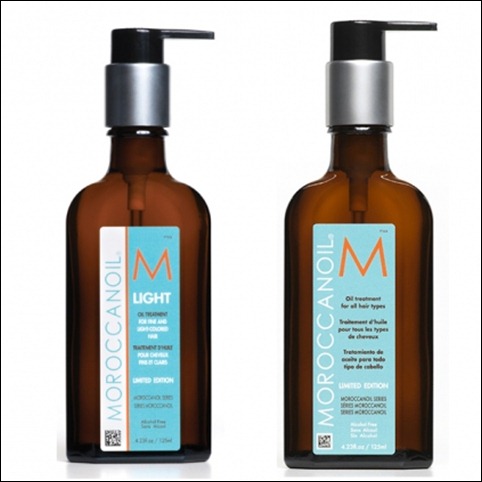
11576763-moroccan-oil-treatment-light-and-original- from PRLog125ml


But first abit of Moroccan Oil’s history that I found out. The company Moroccan Oil was discovered by Carmen Tal, a hairdresser who first came across it in Israel after having a bad color job, her relative took her to a salon that used Moroccan Oil on her. She absolutely loved and it and set out to bring it across the pond to the US, wanting to share the benefits of this treatment made with Argan Oil. The woman of Morocco have been using Argan Oil for centuries for their hair, skin and nails. Anyway, after bringing Moroccan Oil to the US, Carmen and her hubbie then bought the company and has since developed it into the hugely successful company that it is today. I guess there was definitely a reason why she had to have a bad color job right? Out of every bad comes a good!
 
As I said earlier, I was never a believer of oils on the hair, BUT… the very first time I used this product I tried out the LIGHT formula thinking I shouldn’t go with the original as it might get too greasy and heavy, well, I was soo surprised at the outcome, I have become an instant fan!
 
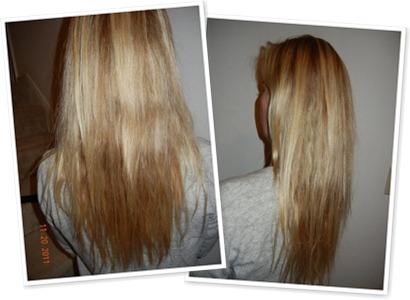
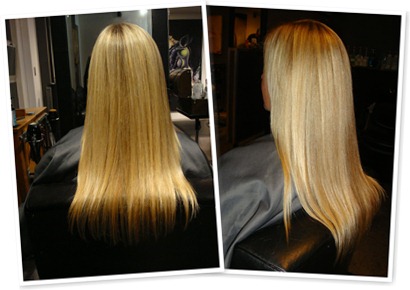
My client Mindy, has fine blonde hair that tangles so easy, the type that knots up as you are trying to dry it or as soon as you’ve put a comb through it, its tangled again. Anyway, I used 2 pumps on my hand and smoothed it into the hair avoiding the roots at first. I blow dried with the dryer but I was so shocked when I didn’t even need to use a brush on her hair! I continued using my fingers to dry it and it didn’t take long to get the hair looking so smooth and shiny. It had me hooked, I felt like it was some miracle treatment.


Anyway, since then I have continued using it on all different types of hair textures and found that…

1. On curly hair, its great to put some through the curls, leave it to dry and it gives curly hair shine (which as we know doesn’t normally happen because of the way the light hits the waves)

2. On frizzier hair textures, you still need to use the brush and smooth it out with the dryer.

3. 9 times out of 10 it works well on the hair leaving it shiny and manageable but there’s still afew heads of hair that it doesn’t seem to work on.

4. Both the original and light formulas do not weigh the hair down.

But all in all, this product is great and I would recommend anyone with frizzies should at least try it, most of you will LOVE it!

Dekko’s Daily Grind – Jodi

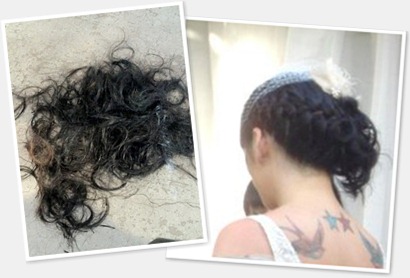
As you all know Jodi is one of my Dekko partners and when she decided recently to cut all her hair off, we got pretty excited about it! She had grown her hair out completely and we did a cute updo for her wedding, anyway, we got soo excited that we took pictures of everything but the ‘Before’ picture, Duh! I was convinced this wouldn’t be a problem cos we could sift through our old photos to find one of her… anyway no such luck, Jodi did not have one evidence that she even grew her hair that long. Anyway, I decided to take things into my own hands and show you what the before looked like. I took a Sharpie pen and drew it for you : )

Jodi 2 cut

Cute huh? Anyway here are pics of how much we cut off and just for the hell of it, here’s a pic of her wedding do from the back..

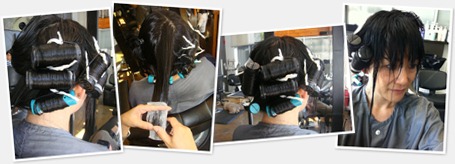
Oh I forgot to tell you that I have not done a perm for maybe about 20years, so Jodi decided that I was gonna do hers! This was gonna be real fun. Once I got my mind around the idea, the perm was actually quite fun to do, I had not forgot how to wind. Using huge rods and leaving the top and front straight we wound the rods in different directions using huge sectioning..

Anyway, 20mins development time later we have a fabulous perm, if I may I say so myself..

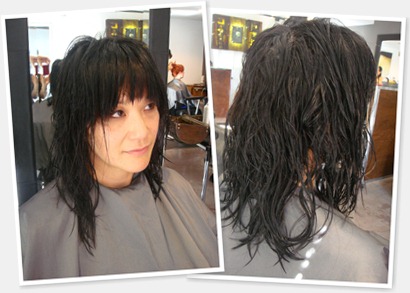
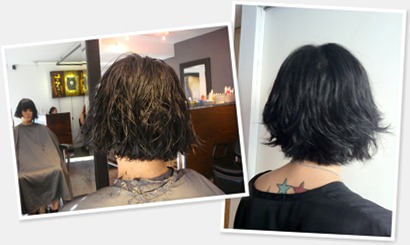
So then we started cutting it all off, first by giving her a bowl shape and then layering it all through until there was plenty of movement and we thinned it  out and textured it thoroughly.

With the front area we made the outline stronger and heavier looking and then blended it back into the sides, as you can see the perm was just enough to create the kicks and movement on the sides so it gave the shape abit of a scruffier look, not a bad perm for an amateur eh? Could’ve been very bad news!

And here’s a nice fancy picture of the finished result to show you.. Thanks Jodi : )

IMG_2364

Different Partings for the Hair…

Quite often clients come into the salon and while going through the consultations one important topic comes up and that is where should one wear her parting. (or Part as you say here in the US)

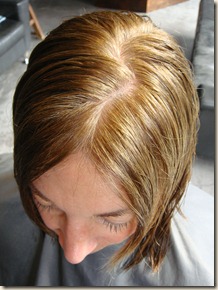
8 times out of 10, a persons parting is already set because the crown part of the hair will usually swirl in one way or another to determine which side your parting would best sit. When I say the crown I am referring to the round swirly shape on top of the head, some people think of this as their ‘bald spot’ which is not the case, it is just because some hair swings so much its leaves that area flat and looking ‘bald’.

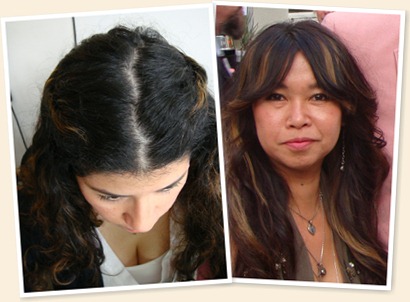
You could be one of those lucky people where your hair will sit quite nicely anywhere, but for others, your parting could be either very set to either side or even worse the middle. Then there’s others who have a double crown which could cause quite abit of chaos with the front top of the hair. If you choose to wear your hair against the growth of your parting then height is created.

I will show you different ways of wearing the parting (with the help of some staff at Dekko) for people who do have the opportunity to play around more.

Side Parting – (both normal and low)

The most common parting, this is great for people who want to have more height on top as this will give the illusion of having more lift. Partings can be ultra straight (some done with a comb) or as I prefer to have it slightly messier, the messier parting will make thin hair look slightly thicker, it can also help hide any color roots that may be coming through, It can be done either in a straight line or diagonal.

Middle (Center) Partings –

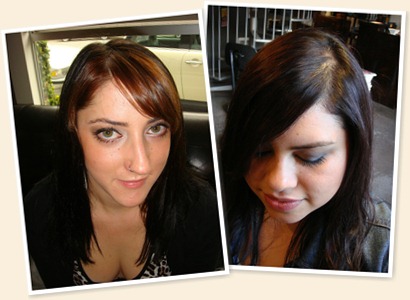
With center partings I have found that a lot of people cannot get away with this as much as side partings. It can leave the hair looking quite flat, as you will have a line down the middle of the head and the hair on both sides have no where to hang but straight down. For people with irregular face shapes, having a middle parting (especially a strong straight line) can bring out the uneven features more. BUT.. having said all that, I love middle partings, as the look can be much trendier than the sophisticated feminine side part. What I do tend to do is to part the front of the hair down the middle but the crown I will keep more to the side which makes it less definite. Here’s how I wear my center part. (2nd picture)

Zigzag Parting –

With the zigzag partings, this does not mean you literally have to put in a definite zigzag in the top of your hair, but more or less a casual version of a zigzag, this will create a more interesting movement and look, by giving hair more height, hiding overgrown color and giving hairstyles a much messier trendier look.
DSC02602

Last but not least, we have the NO Parting

This would be mainly for people who have deep fringes (bangs) where most of the hair comes forward therefore no parting is necessary.

Thanks to all my models: Ryan, Melina, Violet, Jill, Ashley and Liz Marting

Hit or Miss?

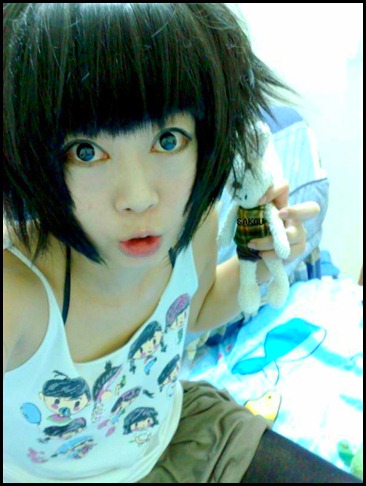
Wonder what most of you think of this one? Cute? Pretty?

For me, this is a definite NO NO, The hairstyle is so wrong for the face shape, it closes the face in and makes it look so narrow! The potential for cuteness is all there, with the anime contacts and the cutesy look, but please, the fringe area needs to open up more for it to work ….

kawaii-asian-short-hairstyle

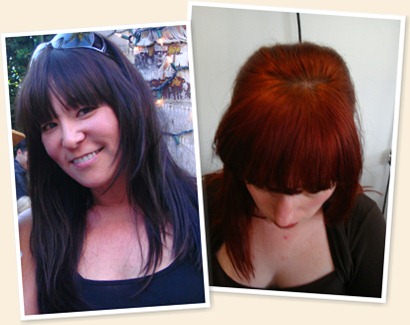
Cool Mops

OK so its been a while since I’ve been out on the streets looking for some Cool Hair to show, but I have to get myself back into action. So here’s some fabby stuff to show you, Thanks to Scott for letting me show Sophy’s hair and Joni for Lillian’s. Thanks to all the girls for letting me show off your looks, <3 <3

Dekko’s Daily Grind.. Michelle

Showcasing some more work from Joni at Dekko Salon. Michelle came in with fairly long hair and wanted to have a change. After a consultation, Joni went about her work and created a shorter cute, messy fresher style for Michelle.

Cut with a razor to give more texture and create messier lines, but still keeping in with the graduated shape through the back to give it a nicer profile, Joni created a shredded asymmetric bob shape that has been styled with styling cream to bring out Michelle’s natural movement in the hair. Nice Joni, thanks for posing for me Michelle : )

My Pick..

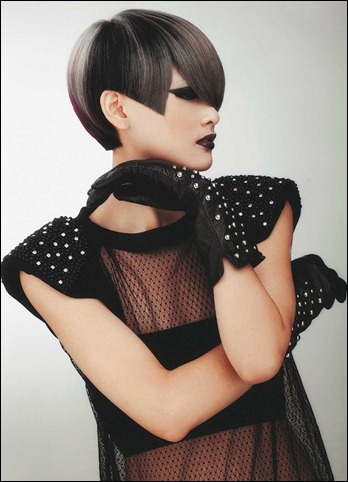
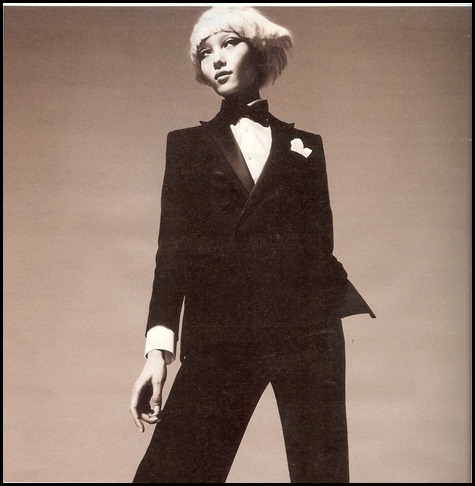
Taken from a DSquared Ad, its most probably a wig but hey, I liked the total look of it a lot.

Love the bowl shape as well as the way it has slightly chunky edges and a little bit of layering throughout the edges. We used us call this the pageboy/halo style back in the Vidal Sassoon UK days.


If anyone is interested, there’s a great new educational website that features a heck of a lot of talent showing alot of haircuts and colors. Here is a clip of a video of a classic Halo haircut demonstrated by Stacey Broughton. (Ex Artistic Director from Sassoons)

Nice!!

DSquared2

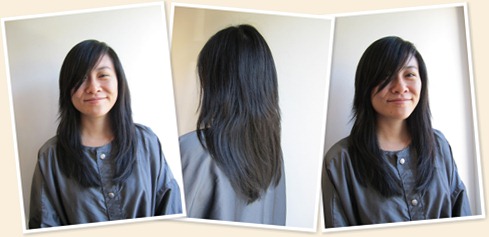
Dekko’s Daily Grind–Patricia

Patricia came into Dekko Salon a while ago and had grown her hair long enough so that she could donate it to one of the many organizations that create wigs for people with hair loss with cancer or other diseases. Good for you Patricia.
Anyway as you can see from the pictures below she certainly had a lot of length to work with. We must’ve had about 12 inches that we could cut off and still have a decent shoulder length style.

We decided to give Patricia a style that was around shoulder length, we made sure she had plenty of layers and because her hair is so thick, we took a lot of weight out of it and textured it quite a lot. Because Patricia’s face shape was more on the long side than any other shape, we thought it would be good to give her a softer fringe to balance out the length. We dried it casually with no brush, and then we rolled some styling cream onto the ends just to give it abit more texture.
I must say that we were very pleased with the end result and thought Patricia looked very sexy and
fresh : )
Thanks a lot Patricia for posing and for donating!